# bronzeburner
**bronzeburner** is a humble network scanner
use it to monitor your enterprise's ports over time
[About](#about) •
[Installation](#installation) •
[Example](#example) •
[FAQ](#faq) •
[Contributing](#contributing) •
[License](#license)
## About
`bronzeburner` is a utility for any sized corporation to help manage exposed services and ports against threats both internal and exterinal.
As firewalls are modified or replaced, rules can be misconfigured so that addresses or ports are available externally that perhaps shouldn't be.
Initially, bronzeburner was going to be a passive perimeter monitor using nfqueue (and alternatively, XDP) to inspect communications. After
implementing this, I realized it did not meet the requirements for the assignment which requires a proactive approach. bronzeburner was rewritten
as a classic network scanner which instruments `rustscan`, expertly parses its output, and inserts it into a time series database most information
security workers should be familiar with.
This instrumentation approach is a bit more basic but enables users to customize their querying, alerting, and filtering requirements themselves using
InfluxDB, Grafana, or any other data sink. As a traditional scanner, it can be run from any location within a network or even from outside, perhaps from a remote
cloud VM.
## Installation
This project was authored for use with Pypy3.10 for performance reasons, but will likely run fine with any full Python implementation.
Unfortunately, this means several useful libraries are yet incompatible (e.g., uvloop).
### Requirements & Recommendations
- [RustScan](https://github.com/RustScan/RustScan) (required, in $PATH)
- [InfluxDB 2.x](https://github.com/influxdata/influxdb) (required)
- [Grafana](https://github.com/grafana/grafana) (optional, recommended)
- Docker (recommended)
### Getting Started
These basic instructions assume you're running a Linux or macOS system. If you aren't, the instructions can easily be adapted.
If you don't already use [pyenv](https://github.com/pyenv/pyenv), look into using it to manage your Python versions. Use it to install
Pypy3.10 or install it manually. For macOS users, Pypy3.10 can be installed with `brew install pypy3.10`.
Clone this repository with `git clone ...`. Browse to the newly created project directory with `cd bronzeburner`. Create a new virtual
Python environment with `pypy3.10 -m venv venv` and activate it with `source venv/bin/activate`. Install bronzeburner and its dependencies
with `pip install .`.
Install Docker if you don't already use it. Create a persistent directory to store your data (i.e., `/opt/influxdb`). To run an InfluxDB instance,
run `docker run -v /opt/influxdb:/var/lib/influxdb2 -p 8086:8086 influxdb:2.7.1-alpine`. Browse to [http://127.0.0.1:8086/](http://127.0.0.1:8086/) and
set up your instance. Create a new API key with write access to your new org's new bucket and note it down.
You're ready to run bronzeburner.
```bash
❯ bronzeburner -h
usage: bronzeburner [-h] -a ADDRESS -u URL -o ORG -b BUCKET -t TOKEN
A humble network scanner
options:
-h, --help show this help message and exit
-a ADDRESS, --address ADDRESS
IP address or CIDR range to scan
-u URL, --url URL InfluxDB server URL
-o ORG, --org ORG InfluxDB organization
-b BUCKET, --bucket BUCKET
InfluxDB bucket
-t TOKEN, --token TOKEN
InfluxDB token
```
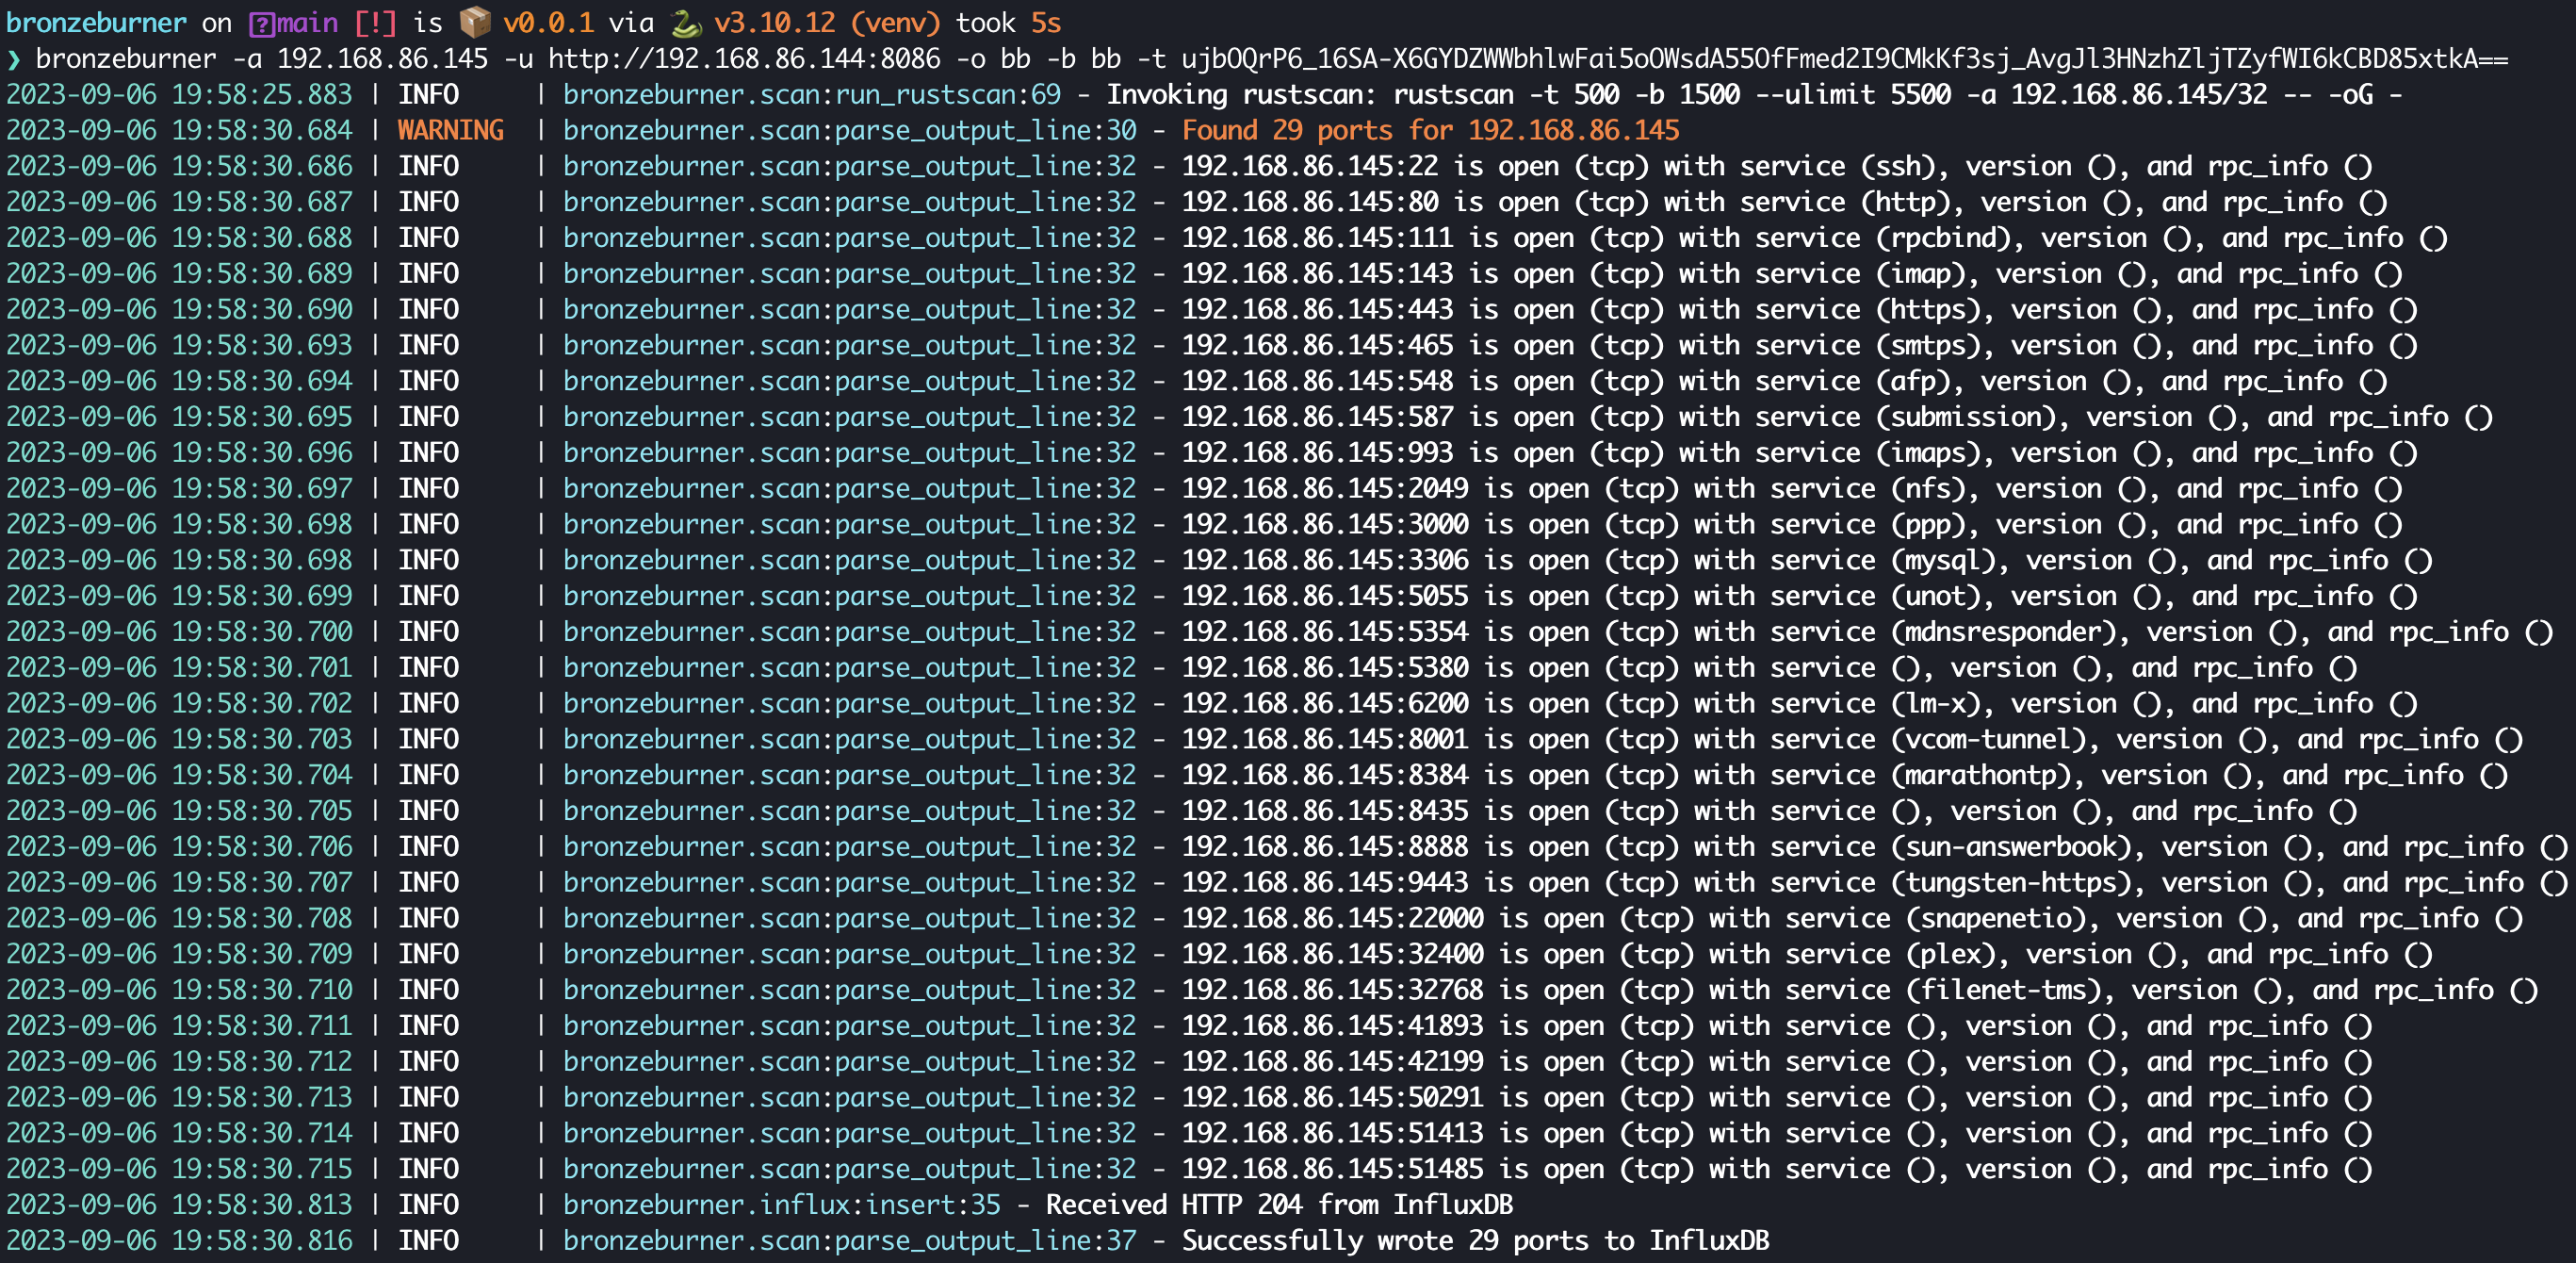
Decide on a target. bronzeburner accepts IPv4 addresses and CIDR ranges as address targets but can be extended to include additional options. See the
example execution below.
## Example
### CLI
 # bronzeburner
**bronzeburner** is a humble network scanner
use it to monitor your enterprise's ports over time
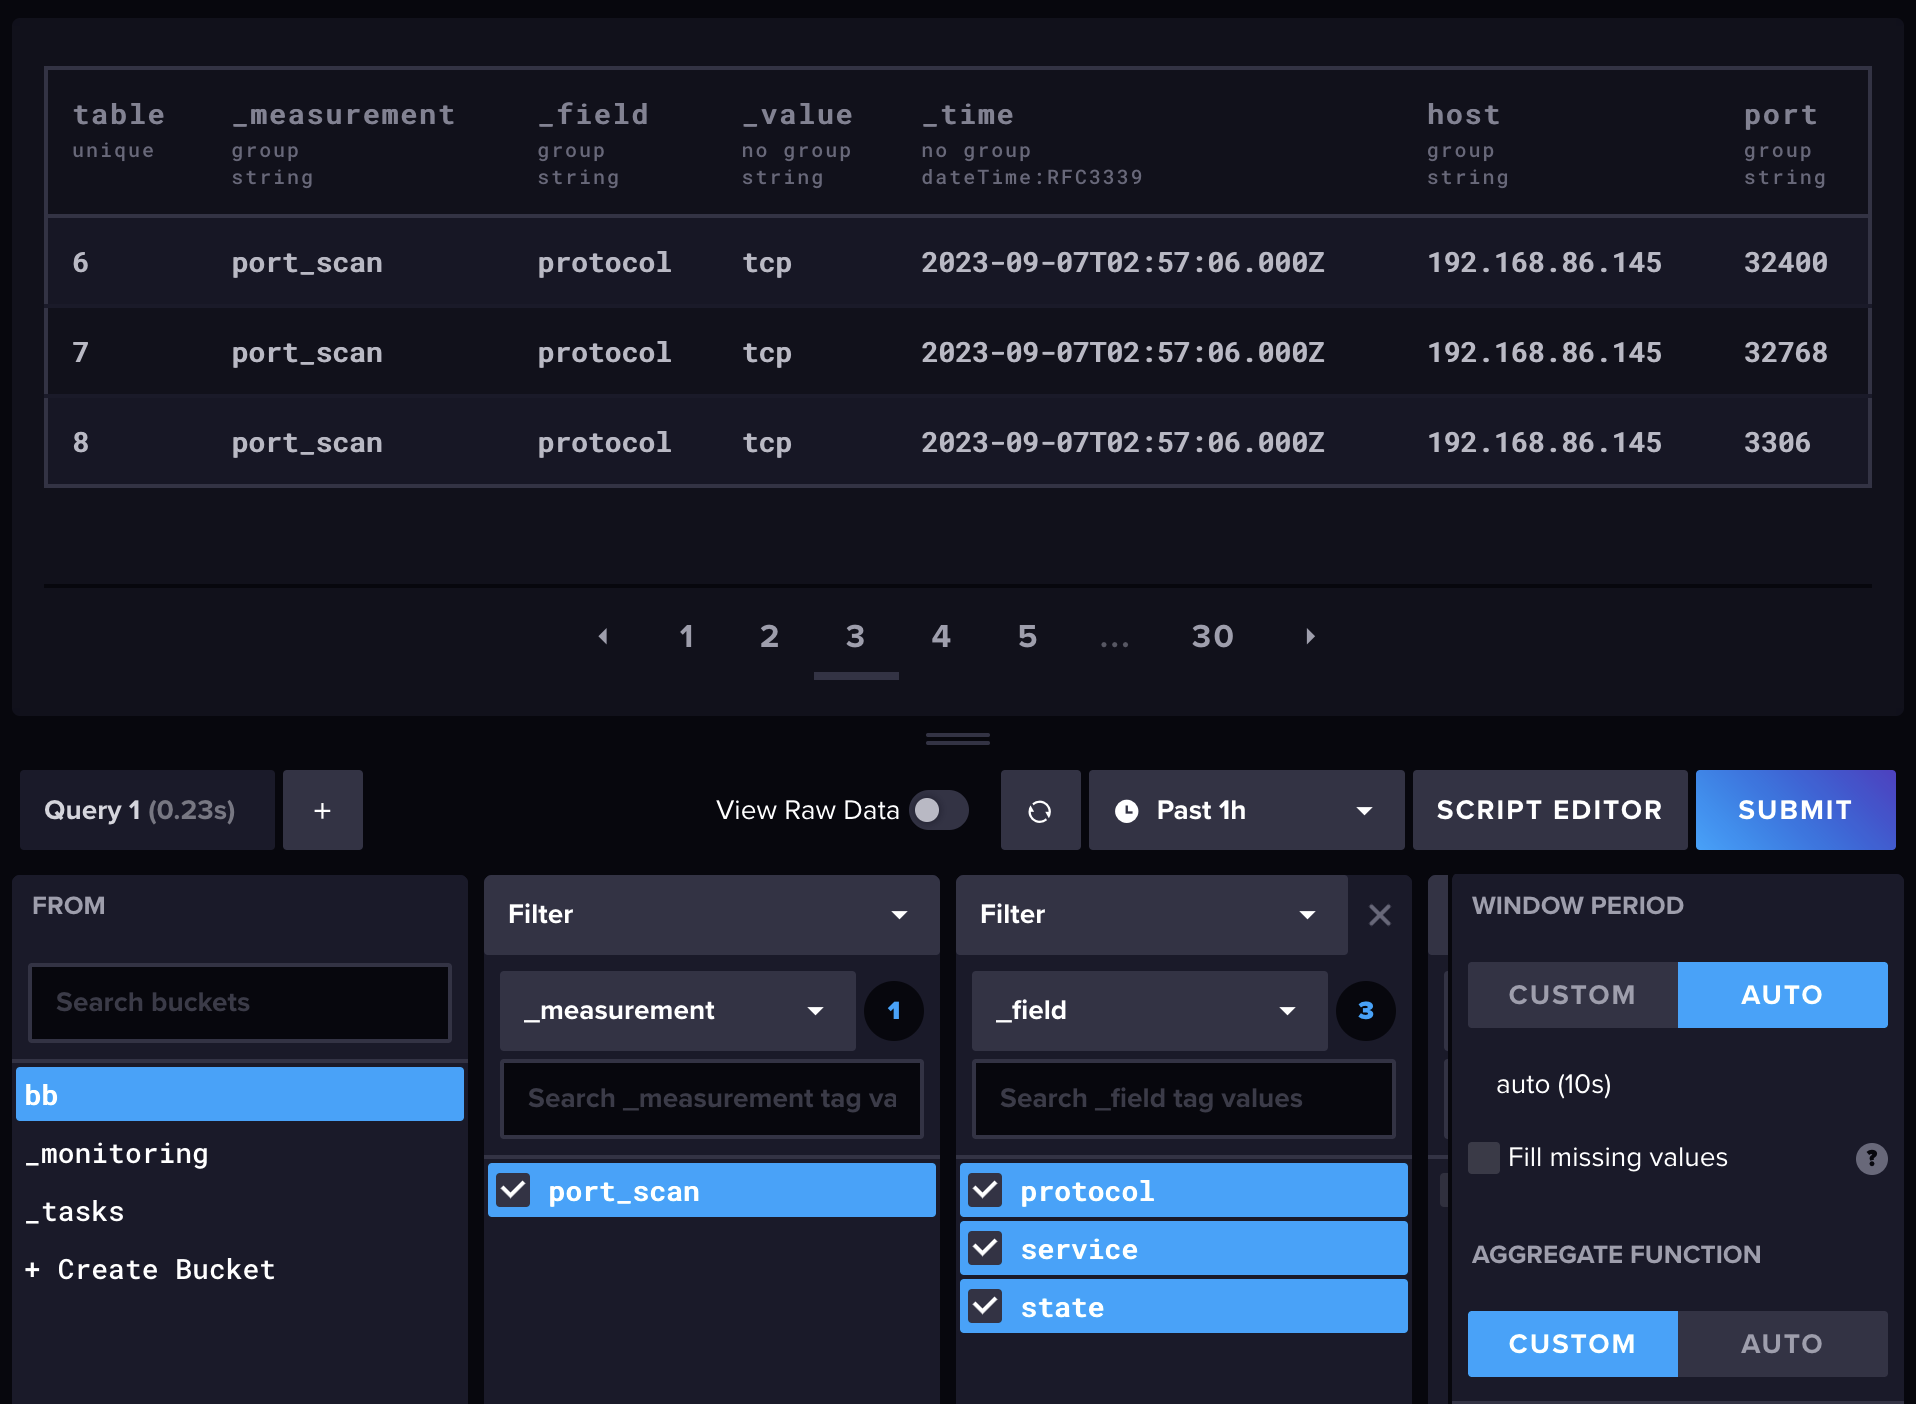
 ### InfluxDB Simple Table
Below is an example of the data inserted into InfluxDB by bronzeburner. Grafana can be integrated with InfluxDB to plot timelines of ports
for each host or to alert on newly observed hosts or ports.
 ## FAQ
**This scans all ports? Isn't that slow?**
It can be if you use nmap. RustScan, which bronzeburner uses, multiprocesses nmap and is capable of scanning all ports on a single host in as fast as three seconds!
**I see timestamp data is saved in the time series DB, but I'd also like some logging. What's my best bet?**
bronzeburner logs comprehensively to STDOUT, so simply forward the output of bronzeburner to a file with `bronzeburner